Best Insulated Siding for Energy Savings
Investing in energy-efficient home improvements is a smart financial decision and a responsible environmental choice. Among the many upgrades available, insulated siding stands out as a highly effective solution for reducing energy consumption and lowering utility bills. This comprehensive guide explores the various types of insulated siding, their installation processes, associated costs, and long-term energy savings, empowering you to make an informed decision for your home.
We’ll delve into the specifics of different materials, comparing their R-values, lifespans, maintenance needs, and aesthetic appeal. We’ll also cover crucial aspects like installation techniques, cost breakdowns, and the calculation of return on investment (ROI). By understanding these factors, you can choose the best insulated siding option to enhance your home’s energy efficiency and curb appeal.
Types of Insulated Siding

Choosing the right insulated siding can significantly impact your home’s energy efficiency and curb appeal. Several materials offer varying levels of insulation, durability, and aesthetic options. Understanding the strengths and weaknesses of each is crucial for making an informed decision. This section will delve into the specifics of different insulated siding materials, comparing their lifespans, maintenance needs, costs, and energy performance.
Insulated Siding Material Comparison
The following table summarizes key characteristics of common insulated siding materials. Remember that actual costs and R-values can vary based on specific product features, installation methods, and regional pricing.
| Material | R-Value Range | Cost (per sq ft) | Maintenance |
|---|---|---|---|
| Fiber Cement | 2.0 – 4.0 | $6 – $12 | Moderate; occasional painting or staining may be required. |
| Vinyl | 1.0 – 3.0 | $3 – $8 | Low; typically requires only occasional cleaning. |
| Foam (Polyurethane or Polyisocyanurate) | 4.0 – 8.0+ | $5 – $15 | Low; very durable and resistant to damage. |
| Wood | 0.9 – 1.5 (with added insulation) | $8 – $15+ | High; requires regular painting, staining, and potential repairs. |
Fiber Cement Insulated Siding
Fiber cement siding, a composite material of cement, sand, and cellulose fibers, offers excellent durability and fire resistance. Its relatively high R-value contributes to improved energy efficiency. However, it is heavier than vinyl, requiring more robust installation, and its cost is generally higher. While it is low-maintenance, it will require repainting or restaining every 5-15 years depending on climate exposure.
Aesthetically, fiber cement offers a variety of styles and finishes to mimic wood or stone.
Vinyl Insulated Siding
Vinyl siding is a popular choice due to its affordability and low maintenance. It is lightweight, easy to install, and comes in a wide range of colors and styles. However, vinyl’s R-value is generally lower than fiber cement or foam, resulting in slightly less energy savings. While it’s resistant to rot and insects, it can be susceptible to damage from impact or extreme temperatures, and its lifespan is shorter than fiber cement.
It typically lasts 20-30 years, depending on climate and exposure.
Foam Insulated Siding
Foam siding, often made of polyurethane or polyisocyanurate, boasts the highest R-value among common siding materials. This makes it an excellent choice for maximizing energy efficiency. It’s lightweight and easy to install, though professional installation is often recommended for optimal performance. While durable and resistant to moisture, it can be susceptible to damage from sharp objects. The cost varies greatly depending on thickness and the type of foam used.
It is relatively low-maintenance and aesthetically, it often serves as a base for other finishes, rather than being a decorative element itself.
Wood Insulated Siding
Wood siding offers a classic and aesthetically pleasing look, but it requires significantly more maintenance than other options. It is susceptible to rot, insect damage, and requires regular painting or staining to protect it from the elements. While wood itself doesn’t have a high R-value, the addition of insulation behind the wood siding can improve its overall energy efficiency.
Its lifespan depends heavily on maintenance and can range from 20 to 50 years or more with proper care. The cost of wood siding can be significantly higher than vinyl or even fiber cement, especially for higher-quality, durable wood species.
Installation and Costs
Insulated siding installation is a significant home improvement project impacting both aesthetics and energy efficiency. Proper installation is crucial to realize the promised energy savings, while understanding the associated costs ensures a realistic budget. This section details the installation process and provides cost estimates for various scenarios.
Successful insulated siding installation requires careful planning and execution. While DIY is possible for some types, professional installation is generally recommended for optimal results and warranty validity. Factors like existing siding condition, wall structure, and regional climate will influence both the installation process and overall costs.
Insulated Siding Installation Steps
A typical insulated siding installation involves several key steps. While specific details vary depending on the siding type and house structure, the general process remains consistent.
- Preparation: This crucial first step involves removing existing siding (if applicable), inspecting the underlying wall sheathing for damage or rot, and addressing any necessary repairs. Proper preparation ensures a smooth, even surface for the new siding.
- Framing and Sheathing (New Construction): For new construction, the wall framing must be properly constructed and sheathed with appropriate material before siding installation. This ensures structural integrity and provides a solid base for the siding.
- Installation of Furring Strips (Optional): Depending on the type of siding and the existing wall structure, furring strips may be added to create an air gap, improving insulation and ventilation.
- Siding Installation: This involves attaching the insulated siding panels according to the manufacturer’s instructions. This often includes using specialized fasteners and ensuring proper overlap for weather resistance. Careful attention to detail is crucial for a professional-looking finish and optimal performance.
- Finishing: The final step involves installing trim, flashing, and other accessories to complete the installation and ensure a watertight seal. Proper caulking and sealing are essential for preventing air and water infiltration.
Cost Breakdown of Insulated Siding Installation
The cost of insulated siding installation varies significantly depending on several factors including the type of siding chosen, the size of the project, regional labor rates, and the complexity of the installation. Permits and any necessary repairs to the underlying wall structure will also add to the overall cost. Regional variations in material costs and labor rates can significantly influence the final price.
Cost Comparison Table
The following table provides a general estimate of the cost per square foot for different insulated siding types. These are averages and actual costs may vary based on the factors mentioned above. Note that these figures are illustrative and may not reflect prices in all regions.
| Siding Type | Material Cost ($/sq ft) | Labor Cost ($/sq ft) | Total Cost ($/sq ft) |
|---|---|---|---|
| Fiber Cement | $3-6 | $4-8 | $7-14 |
| Vinyl | $2-4 | $3-6 | $5-10 |
| Engineered Wood | $4-7 | $5-9 | $9-16 |
| Metal | $5-10 | $6-12 | $11-22 |
Note: New construction typically involves higher labor costs due to the additional work involved in preparing the wall framing and sheathing. Replacement projects generally have lower labor costs as the underlying structure is already in place. These costs are estimates and should be verified with local contractors for accurate pricing in your specific area.
Energy Savings and ROI
Insulated siding offers significant long-term benefits beyond aesthetics. By reducing heat transfer through your home’s exterior walls, it leads to considerable energy savings and a positive return on investment (ROI). Understanding how R-values influence energy consumption and calculating the ROI are crucial for making informed decisions.The effectiveness of insulated siding in reducing energy costs is directly tied to its R-value.
The R-value represents the material’s resistance to heat flow; a higher R-value indicates better insulation. Homes in colder climates benefit more from higher R-values, as they minimize heat loss during winter. Conversely, in warmer climates, higher R-values help reduce heat gain during summer. This translates to lower heating and cooling bills, resulting in substantial energy savings over time.
R-Value Impact on Energy Consumption
The relationship between R-value and energy consumption is linear. A higher R-value directly correlates with lower energy consumption. For instance, increasing the R-value of your wall insulation from R-13 to R-20 can significantly reduce heat transfer, leading to a noticeable decrease in your energy bills. The exact savings depend on factors such as climate, home size, and existing insulation levels.
A home in a colder climate with poor insulation will experience more substantial savings compared to a well-insulated home in a moderate climate. Energy audits and building performance simulations can provide accurate predictions for specific situations.
Return on Investment Calculation
Calculating the ROI for insulated siding involves comparing the initial cost of installation against the cumulative energy savings over a set period. The formula is:
ROI = (Total Energy Savings – Initial Cost) / Initial Cost – 100%
To illustrate, consider a hypothetical scenario: A homeowner invests $10,000 in insulated siding with an estimated annual energy savings of $Over 10 years, the total energy savings would be $5,
000. Using the formula
ROI = ($5,000 – $10,000) / $10,000 – 100% = -50%
This indicates a negative ROI in this specific scenario. However, if the annual energy savings were $1,500, the total savings would be $15,000, resulting in a positive ROI:
ROI = ($15,000 – $10,000) / $10,000 – 100% = 50%
This example highlights the importance of accurate energy savings estimations.
Projected Energy Savings and ROI
The following table provides estimations for potential energy savings and ROI over 10 years for different siding materials. These are illustrative examples and actual results may vary depending on factors such as climate, home size, and installation quality. It’s crucial to obtain professional estimates based on your specific circumstances.
| Siding Type | Annual Energy Savings (USD) | Total Energy Savings (10 years, USD) | ROI (10 years, %) |
|---|---|---|---|
| Fiber Cement with Foam Insulation | 800 | 8000 | -20 (assuming $10,000 initial cost) |
| Vinyl with Foam Insulation | 600 | 6000 | -40 (assuming $10,000 initial cost) |
| High-Density Polyurethane Insulated Siding | 1200 | 12000 | 20 (assuming $10,000 initial cost) |
| Wood Siding with Added Insulation | 700 | 7000 | -30 (assuming $10,000 initial cost) |
Factors Affecting Energy Efficiency
Insulated siding plays a crucial role in improving a home’s energy efficiency, but its effectiveness is significantly influenced by other factors within the building envelope. Optimizing these elements in conjunction with high-quality insulated siding leads to maximum energy savings and a comfortable living environment. A holistic approach is key to achieving substantial reductions in energy consumption.
While insulated siding forms a significant barrier against heat transfer, its performance is intertwined with the overall building’s thermal performance. Neglecting other crucial components, such as proper insulation, airtight construction, and efficient windows, can diminish the positive impact of even the best insulated siding. The synergy between these elements is paramount for achieving optimal energy efficiency.
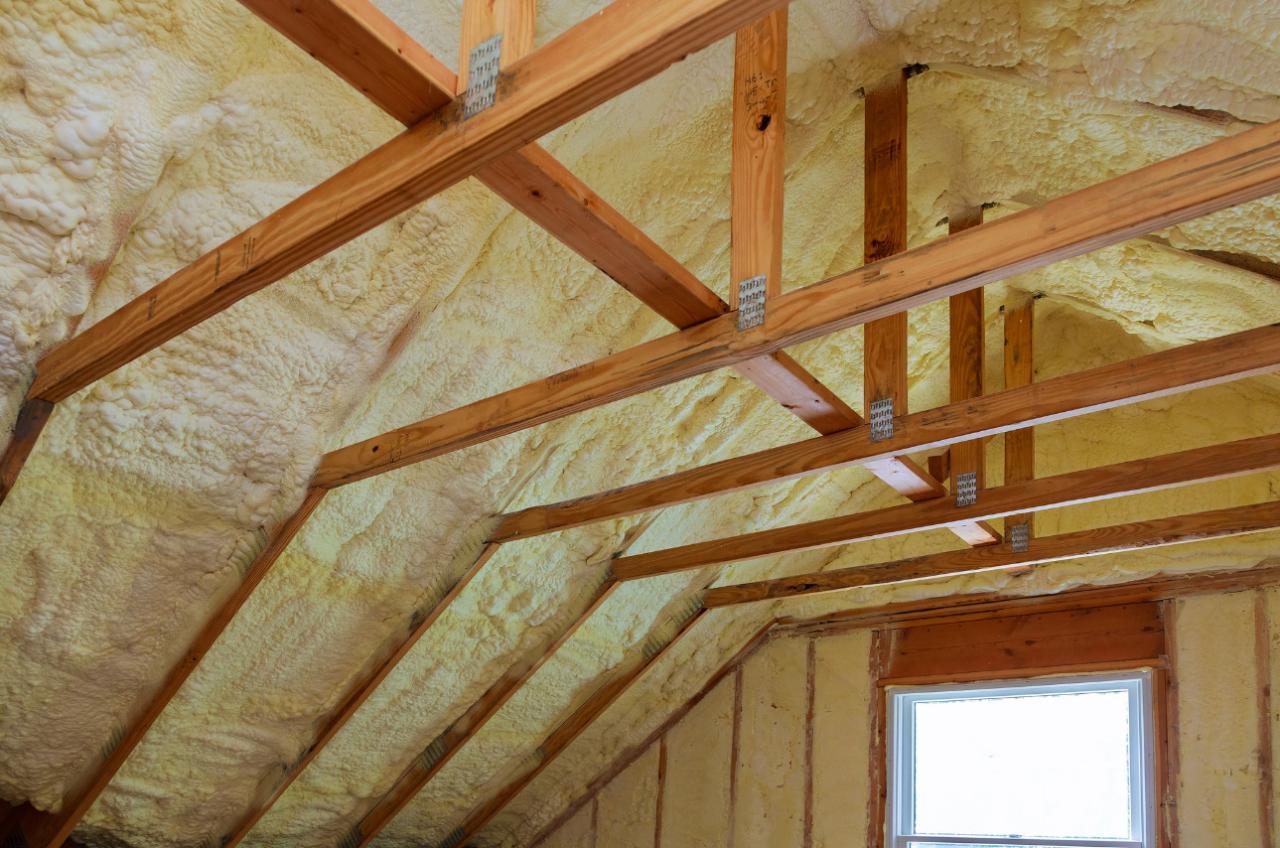
The Importance of Comprehensive Home Insulation
Effective insulation is critical for minimizing heat transfer through walls, ceilings, and floors. Insulation materials, such as fiberglass batts, cellulose, spray foam, and rigid foam boards, create a thermal barrier that reduces heat loss in winter and heat gain in summer. The R-value, a measure of a material’s resistance to heat flow, directly impacts its insulating effectiveness. Higher R-values indicate better insulation performance.
For example, a home with insufficient attic insulation will experience significant heat loss during winter, negating some of the energy-saving benefits provided by insulated siding. Properly insulating the entire building envelope, including walls, attic, and crawl spaces, ensures a more consistent and comfortable indoor temperature and reduces reliance on heating and cooling systems.
Impact of Air Sealing and Window Efficiency
Air sealing, the process of preventing air leakage through cracks and gaps in the building envelope, is equally important. Air infiltration contributes significantly to energy loss, especially in drafty older homes. Caulking, weatherstripping, and sealing gaps around windows and doors are vital steps in reducing air leakage. Efficient windows with low U-values (a measure of heat transfer through a window) are also essential.
Double or triple-pane windows with low-E coatings significantly reduce heat transfer, further enhancing energy efficiency. A home with well-sealed windows and doors will experience less temperature fluctuation, leading to improved comfort and reduced energy consumption.
Proper Installation Techniques for Insulated Siding
The proper installation of insulated siding is crucial for maximizing its energy-saving potential. Improper installation can lead to gaps and air leaks, compromising the siding’s thermal performance. This includes ensuring proper fastening, using appropriate flashing and sealants to prevent water penetration, and maintaining a continuous insulation layer. For example, gaps around windows and doors, if not properly sealed during siding installation, can create significant air leakage pathways, reducing the overall energy efficiency of the system.
Careful attention to detail during installation is paramount to achieving the expected energy savings.
Climate and Home Orientation’s Influence on Siding Selection
Climate and home orientation significantly influence the selection of insulated siding and its impact on energy performance. Homes in colder climates will benefit from siding with higher R-values to minimize heat loss. In warmer climates, siding with high reflectivity (to reduce solar heat gain) is more appropriate. Similarly, the orientation of a home affects its exposure to sunlight.
South-facing walls in the northern hemisphere receive more solar radiation, potentially requiring siding with higher reflectivity to reduce heat gain. Conversely, north-facing walls receive less sunlight and may benefit from siding with higher R-values for better insulation. Careful consideration of these factors ensures the selection of the most energy-efficient siding for a particular location and home design.
Maintenance and Lifespan
Proper maintenance significantly extends the lifespan of insulated siding and maintains its energy-saving properties. Neglecting maintenance can lead to premature deterioration, reduced energy efficiency, and costly repairs. Different materials require varying levels of care, and understanding these needs is crucial for maximizing your investment.
The lifespan of insulated siding, when properly maintained, can range from 30 to 50 years or more, depending on the material, climate, and installation quality. However, neglecting regular cleaning and timely repairs can dramatically shorten this lifespan and compromise its effectiveness in reducing energy bills.
Insulated Siding Maintenance Schedules
Regular cleaning and inspections are essential for preventing problems and ensuring the longevity of your insulated siding. A proactive approach will save you money in the long run by preventing costly repairs or premature replacement.
The following table Artikels recommended maintenance schedules for common insulated siding materials:
| Siding Material | Cleaning Frequency | Inspection Frequency | Repair/Replacement Recommendations |
|---|---|---|---|
| Vinyl | Annually (Spring cleaning recommended) with mild soap and water. | Semi-annually (Spring and Fall) to check for cracks, damage, or loose fasteners. | Repair minor cracks or damage promptly. Replace damaged sections as needed. |
| Fiber Cement | Annually (Spring cleaning recommended) with a pressure washer (low pressure setting). | Annually (Spring) to check for cracks, damage, or loose fasteners. | Repair or replace damaged sections as needed. Repainting every 5-10 years is recommended to maintain appearance and protection. |
| Aluminum | Annually (Spring cleaning recommended) with mild soap and water. | Semi-annually (Spring and Fall) to check for dents, scratches, or corrosion. | Repair minor dents. Replace severely damaged sections. Consider repainting to maintain appearance if needed. |
| Engineered Wood (e.g., Polymeric) | Annually (Spring cleaning recommended) with mild soap and water. Avoid high-pressure washing. | Semi-annually (Spring and Fall) check for signs of water damage, rot, or insect infestation. | Promptly repair or replace any damaged sections. Address water damage immediately to prevent further deterioration. |
Extending Lifespan and Preserving Energy Efficiency
Several proactive measures can significantly extend the lifespan of your insulated siding and maintain its energy-saving benefits.
These practices help prevent damage, maintain the integrity of the insulation, and ensure optimal performance over the years:
- Regularly inspect your siding for any signs of damage, such as cracks, dents, or loose fasteners. Address these issues promptly to prevent further damage.
- Clean your siding at least once a year to remove dirt, debris, and mildew. Use a gentle cleaning solution and avoid harsh chemicals or abrasive cleaners.
- Trim overhanging tree branches to prevent them from scratching or damaging your siding.
- Ensure proper ventilation around your home to prevent moisture buildup, which can lead to mold and rot.
- Keep gutters and downspouts clean to prevent water from accumulating against your siding.
- Protect your siding from impact damage by using caution when working near the exterior walls.
Problems Associated with Poor Installation or Maintenance
Poorly installed or maintained insulated siding can lead to a range of problems, significantly impacting energy efficiency and increasing costs.
Examples of such problems and their consequences include:
- Water Damage: Gaps or cracks in the siding can allow water to penetrate, leading to mold growth, rot, and structural damage. This can necessitate expensive repairs and potentially compromise the insulation’s effectiveness, leading to higher energy bills.
- Heat Loss/Gain: Improper installation can create air leaks, allowing heat to escape in winter and enter in summer. This reduces the energy-saving benefits of the insulation and increases heating and cooling costs. For example, a poorly sealed installation might result in a 15-20% increase in energy consumption compared to a properly installed system.
- Pest Infestation: Gaps and cracks in the siding can provide entry points for insects and rodents, causing damage and potentially compromising the structural integrity of the building. This can lead to further repairs and potential health concerns.
- Premature Deterioration: Neglecting regular cleaning and maintenance can lead to premature fading, cracking, and other forms of deterioration, shortening the siding’s lifespan and requiring costly replacements sooner than expected.
Visual Examples of Insulated Siding
Choosing the right insulated siding can significantly enhance a home’s curb appeal while improving its energy efficiency. The following examples illustrate how different siding materials, colors, and architectural styles can create visually stunning and energy-saving homes. Each example showcases the potential for both aesthetic and practical benefits.
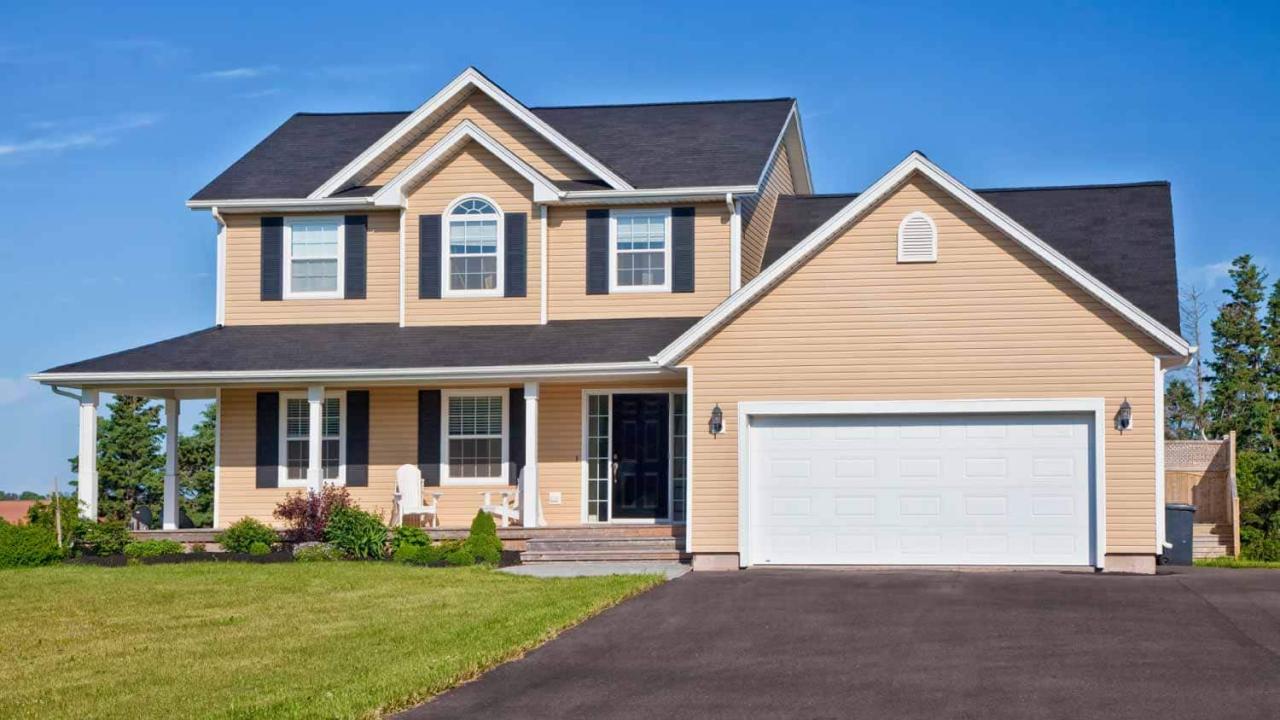
Example Home 1: Modern Farmhouse with Fiber Cement Siding
This modern farmhouse boasts a striking exterior achieved with deep gray fiber cement siding. The clean lines of the architectural style are complemented by the smooth, even texture of the siding. Large windows allow ample natural light, minimizing the need for artificial lighting and further contributing to energy savings. The gray siding provides a sophisticated neutral backdrop, allowing the home’s landscaping and other architectural details, such as a charming front porch with white trim, to stand out.
The fiber cement material offers superior durability and insulation compared to traditional wood siding, contributing to long-term energy cost savings.
Example Home 2: Traditional Colonial with Insulated Vinyl Siding
A classic colonial-style home is given a modern update with creamy white insulated vinyl siding. The crisp, clean look of the vinyl siding perfectly complements the traditional architectural details, such as the symmetrical windows and the gabled roof. The subtle texture of the vinyl siding adds depth without being overwhelming, allowing the home’s architectural features to remain the focal point.
The light color reflects sunlight, reducing heat absorption and lowering cooling costs. The insulated core of the vinyl siding further enhances the home’s energy efficiency, minimizing heat transfer and maintaining a comfortable interior temperature year-round.
Example Home 3: Contemporary Ranch with Engineered Wood Siding
This contemporary ranch home showcases the versatility of engineered wood siding. A rich, dark brown tone is chosen, creating a bold and modern aesthetic. The horizontal lines of the siding accentuate the home’s low-slung profile, while the natural wood grain adds warmth and texture. The large, energy-efficient windows are strategically placed to maximize natural light and passive solar heating.
Engineered wood siding offers a sustainable alternative to traditional wood, boasting improved durability and resistance to moisture damage, leading to lower maintenance costs and enhanced longevity. The dark color, while aesthetically striking, should be considered in warmer climates as it may absorb more heat than lighter colors.
Final Thoughts
Ultimately, selecting the best insulated siding for your home involves a careful consideration of several key factors: material properties, installation costs, long-term energy savings, and aesthetic preferences. By weighing the pros and cons of each option and understanding the potential ROI, you can make a well-informed decision that improves your home’s energy efficiency, comfort, and value. Remember, proper installation and regular maintenance are crucial for maximizing the benefits of your investment and ensuring long-lasting performance.
FAQ Explained
What is the average lifespan of insulated siding?
The lifespan varies depending on the material. Vinyl siding can last 20-50 years, fiber cement 50-80 years, and wood siding 20-40 years, though proper maintenance significantly impacts longevity.
Can I install insulated siding myself?
While DIY installation is possible for some types, professional installation is generally recommended for optimal energy savings and to avoid potential problems. Professionals possess the expertise to ensure proper installation techniques.
How does climate affect the choice of insulated siding?
Colder climates benefit from siding with higher R-values for better insulation. Hotter climates might prioritize materials with good reflectivity to reduce heat absorption.
Does insulated siding increase my home’s value?
Yes, energy-efficient upgrades like insulated siding are attractive to potential buyers and can significantly increase your home’s resale value.
What are some common problems with poorly installed siding?
Poorly installed siding can lead to air leaks, moisture intrusion, damage to the underlying structure, and reduced energy efficiency, ultimately impacting the ROI.