Best Siding Contractors Near Me
Finding the right siding contractor can transform your home’s exterior, enhancing curb appeal and protecting your investment. This guide delves into the crucial aspects of selecting a local siding professional, from understanding market trends and contractor profiles to navigating material choices and project management. We’ll explore various siding materials, communication strategies, and project execution, equipping you with the knowledge to make informed decisions.
Choosing the right contractor involves more than just comparing prices. This guide helps you assess contractor expertise, understand different siding materials and their long-term implications, and effectively manage the entire project, from initial consultation to final walkthrough. We aim to empower you with the confidence to select a contractor who aligns perfectly with your needs and budget.
Understanding Local Market Demand
Understanding the local market demand for siding installation services is crucial for siding contractors to achieve success. This involves identifying popular materials, typical project sizes, and competitive pricing strategies. By analyzing these factors, contractors can tailor their services and marketing efforts to effectively reach potential clients.
Top Requested Siding Materials
The three most requested siding materials in many suburban areas typically include vinyl, fiber cement, and wood. Vinyl siding remains a popular choice due to its affordability and low maintenance requirements. Fiber cement offers superior durability and fire resistance, making it a premium option. Wood siding, while more expensive and requiring higher maintenance, appeals to homeowners seeking a classic and aesthetically pleasing look.
The specific popularity of each material may vary based on regional climate, architectural styles, and homeowner preferences. For example, in areas prone to extreme weather, fiber cement might be more in demand than vinyl.
Average Project Size for Siding Installations
Average siding installation projects vary considerably depending on the size of the home and the scope of work. A small single-family home might involve replacing siding on only one side of the house, while a larger home or a project that includes repairs or additional features could involve a much more extensive undertaking. A reasonable average project size might range from 1,000 to 3,000 square feet of siding, although this is just a broad estimation and could fluctuate significantly based on geographic location and housing styles.
For instance, a contractor in a region with many large Victorian homes would likely see larger average projects compared to one serving a neighborhood of smaller bungalows.
Pricing Strategies of Successful Local Siding Contractors
Successful local siding contractors employ a variety of pricing strategies. Some utilize a per-square-foot pricing model, providing transparency and simplicity. Others might opt for a fixed-price contract after a detailed assessment of the project, which can provide clients with greater cost certainty. A third approach might involve a combination of both, using a per-square-foot estimate initially, then refining it to a fixed price once the specifics of the project are fully understood.
The most successful contractors are transparent about their pricing, clearly outlining all costs, including materials and labor, and avoiding hidden fees. They might also offer discounts for bundled services or for larger projects.
Hypothetical Marketing Campaign
A hypothetical marketing campaign targeting clients searching “best siding contractors near me” could leverage search engine optimization () to ensure the contractor’s website ranks highly in search results. This involves optimizing the website’s content with relevant s, building high-quality backlinks, and ensuring the site is mobile-friendly. Furthermore, the campaign could utilize local search engine marketing (SEM) through platforms like Google Ads, focusing on geo-targeted advertisements.
The advertisements could highlight the contractor’s expertise, competitive pricing, and positive customer reviews. Finally, a strong social media presence, showcasing completed projects and client testimonials, could build brand awareness and trust within the community. The campaign could also include targeted mailers or flyers distributed to neighborhoods with a high concentration of homes that might benefit from siding replacement.
Contractor Profile Creation
Creating detailed profiles for siding contractors helps potential clients make informed decisions. This section will showcase three distinct contractor profiles, highlighting their specializations, pricing strategies, and key features. Understanding these differences is crucial for homeowners seeking the best fit for their project and budget.
Contractor Profiles: Specialization, Pricing, and Key Features
Below is a table outlining three fictional siding contractors, each catering to a different market segment. Each profile includes a description of their specialization, typical pricing, and key features that differentiate them from their competitors. Testimonials are provided to illustrate the customer experience with each contractor.
| Contractor Name | Specialization | Pricing | Key Features |
|---|---|---|---|
| Premier Siding Solutions | High-End Siding Installation | High (Starting at $15,000 for average-sized home) | Utilizes premium materials like cedar and fiber cement; offers custom design options; provides a comprehensive warranty; employs highly skilled, experienced installers. Exceptional customer service. |
| Value Siding Pros | Budget-Friendly Siding Installation | Low to Moderate (Starting at $5,000 for average-sized home) | Focuses on efficient installation using cost-effective, high-quality materials; offers transparent pricing; provides a standard warranty; employs skilled and efficient installers. Strong emphasis on timely project completion. |
| EcoSiding Experts | Eco-Friendly Siding Installation | Moderate to High (Starting at $8,000 for average-sized home) | Specializes in sustainable and recycled siding materials; employs environmentally conscious installation practices; offers extended warranties; prioritizes minimizing waste and environmental impact. Focuses on energy efficiency. |
Testimonials
Providing testimonials adds credibility and builds trust with potential clients. Here are examples of testimonials that could be used for each contractor:
Premier Siding Solutions Testimonial:
“Premier Siding Solutions exceeded all expectations! Their craftsmanship is impeccable, and the quality of their materials is unmatched. The entire process, from initial consultation to final cleanup, was seamless and professional. We are thrilled with our new siding and highly recommend them.”
The Millers, Oakwood Estates
Value Siding Pros Testimonial:
“Value Siding Pros delivered exactly what they promised – quality siding at a fair price. Their team was efficient, respectful, and completed the job on time and within budget. We are very happy with our new siding and would definitely use them again.”
The Johnsons, Willow Creek
EcoSiding Experts Testimonial:
“Choosing EcoSiding Experts was a great decision for both our home and the environment. Their commitment to sustainability is evident in their materials and practices. We love the look of our new siding, and knowing it’s eco-friendly gives us peace of mind.”
The Smiths, Green Valley Estates
Siding Material Deep Dive

Choosing the right siding material is a crucial decision impacting your home’s curb appeal, longevity, and overall cost. This section provides a detailed comparison of five popular siding options, considering durability, maintenance, cost, and environmental impact. Understanding these factors will empower you to make an informed choice that best suits your needs and budget.
Siding Material Comparison
The following table summarizes the key characteristics of five common siding materials: vinyl, wood, fiber cement, metal, and engineered wood. Each material presents a unique balance of advantages and disadvantages.
| Material | Durability | Maintenance | Cost |
|---|---|---|---|
| Vinyl | High; resistant to rot, insects, and moisture. Typically lasts 20-40 years. | Low; requires occasional cleaning. | Low to moderate; generally the most affordable option. |
| Wood | Moderate to high; durability depends on the type of wood and its treatment. Can last 20-50+ years with proper maintenance. | High; requires regular painting or staining, and potential repairs for rot or insect damage. | Moderate to high; cost varies significantly based on wood type and quality. |
| Fiber Cement | High; resistant to fire, rot, insects, and moisture. Typically lasts 30-50 years or more. | Moderate; requires occasional cleaning and repainting every 10-15 years. | Moderate to high; generally more expensive than vinyl but less than some wood options. |
| Metal | High; extremely durable and resistant to damage from weather, insects, and fire. Can last 50+ years. | Low; requires minimal maintenance, primarily cleaning. | High; typically the most expensive siding option. |
| Engineered Wood | Moderate to high; more durable than traditional wood, resistant to rot and insects. Typically lasts 20-30 years. | Moderate; requires periodic cleaning and potential repainting, less maintenance than natural wood. | Moderate; generally more expensive than vinyl, but less than fiber cement or metal. |
Environmental Impact of Siding Materials
The environmental impact of siding materials varies significantly. Consider the following factors when making your selection:
Vinyl siding’s manufacturing process consumes energy and releases greenhouse gases. However, its long lifespan reduces the need for frequent replacements. Wood siding, if sourced from sustainably managed forests, can be a relatively environmentally friendly option, but deforestation remains a concern. Fiber cement siding has a moderate environmental impact, with the manufacturing process requiring energy and generating waste.
Metal siding, often made from recycled materials, boasts a low environmental footprint, but its production still requires energy. Engineered wood siding offers a balance, often using recycled wood fibers, thereby reducing the demand for newly harvested wood. The ultimate environmental impact depends on sourcing, manufacturing processes, and the lifespan of the product.
Client Communication and Service
Exceptional client communication and service are paramount to the success of any siding contracting business. Building strong relationships with clients, from the initial consultation to project completion, fosters trust and ensures positive reviews and referrals. Clear, consistent, and proactive communication minimizes misunderstandings and resolves potential issues efficiently.
Effective communication strategies throughout the project lifecycle are crucial for managing expectations and delivering a superior client experience. This includes detailed email templates, proactive problem-solving, and transparent approval processes.
Email Templates for Client Communication
A series of well-crafted email templates streamlines communication and ensures consistent messaging. These templates should be adaptable to different project stages and client needs.
- Initial Contact/Inquiry Response: Subject: Re: Your Siding Inquiry. Body: Thank you for contacting [Company Name]. We’d be happy to discuss your siding project. Please tell us more about your needs, including your address and preferred contact time for a free consultation. We look forward to hearing from you!
- Consultation Confirmation: Subject: Your Siding Consultation is Confirmed! Body: This email confirms your free consultation scheduled for [Date] at [Time]. We will arrive at [Address] to assess your property and discuss your project in detail. Please let us know if you need to reschedule.
- Proposal Submission: Subject: Your Personalized Siding Proposal. Body: Attached is a detailed proposal outlining the scope of work, materials, timeline, and cost for your siding project. Please review it at your convenience. We are available to answer any questions you may have.
- Project Commencement Notification: Subject: Your Siding Project is Commencing! Body: This email confirms that your siding project will begin on [Date]. Our team will be in contact to coordinate access to your property. We anticipate completion by [Date].
- Project Completion Notification: Subject: Your Siding Project is Complete! Body: We are pleased to announce the completion of your siding project. Please take a moment to inspect the work. We are confident you will be satisfied. We welcome your feedback.
Handling Client Concerns and Complaints
Addressing client concerns and complaints promptly and professionally is essential for maintaining a positive reputation. A structured approach ensures that issues are resolved efficiently and fairly.
- Acknowledge the Concern: Immediately acknowledge the client’s concern and express empathy. For example: “We understand your frustration regarding [issue]. We apologize for any inconvenience this has caused.”
- Gather Information: Gather all necessary information to understand the situation fully. This may involve on-site visits, reviewing project documentation, or speaking with the relevant team members.
- Investigate the Issue: Investigate the root cause of the problem and determine the appropriate solution. This may involve rectifying faulty workmanship, replacing damaged materials, or offering a partial refund.
- Communicate the Solution: Clearly communicate the proposed solution to the client and obtain their agreement. This may involve a phone call, email, or on-site meeting.
- Follow Up: Follow up with the client to ensure that the issue has been resolved to their satisfaction. This demonstrates your commitment to providing excellent customer service.
Obtaining Client Approvals
Securing client approvals at each project stage is crucial for avoiding disputes and ensuring everyone is on the same page. This process should be transparent and clearly documented.
A standard procedure might include:
- Initial Design Approval: Obtain client approval on the initial design plans and specifications before commencing any work.
- Material Selection Approval: Secure client approval on the selected siding materials, colors, and finishes.
- Progress Inspections: Conduct regular progress inspections with the client to review the work’s progress and address any concerns.
- Final Inspection and Sign-Off: Conduct a final inspection with the client upon project completion to confirm that the work meets the agreed-upon specifications. Obtain a signed completion certificate.
Managing Client Expectations
Setting and managing client expectations proactively minimizes misunderstandings and potential disputes. Clear communication is key to this process.
A step-by-step guide could include:
- Clearly Define the Scope of Work: Provide a detailed scope of work document that clearly Artikels all aspects of the project, including materials, timelines, and costs.
- Maintain Open Communication: Keep clients informed of the project’s progress through regular updates, either via email or phone calls.
- Address Concerns Promptly: Address any concerns or questions raised by clients promptly and professionally.
- Set Realistic Expectations: Set realistic expectations regarding timelines and costs, avoiding over-promising or under-delivering.
- Document Everything: Maintain detailed records of all communications, approvals, and changes to the project scope.
Project Management and Execution
Effective project management is crucial for successful siding installation, ensuring the project stays on schedule, within budget, and meets the client’s expectations. This involves careful planning, meticulous execution, and proactive problem-solving. A well-managed project minimizes disruptions and maximizes client satisfaction.
Sample Project Timeline for Siding Installation
A typical siding installation project timeline varies depending on the size and complexity of the job. However, a reasonable estimate for a medium-sized residential project might look like this:
- Week 1: Project kickoff meeting, material ordering, permits (if required), and site preparation (removal of old siding, debris cleanup).
- Week 2: Sheathing inspection and repair (if necessary), installation of house wrap and flashing.
- Week 3: Siding installation begins, focusing on corners, windows, and doors.
- Week 4: Siding installation continues, covering the majority of the house’s exterior.
- Week 5: Completion of siding installation, including trim work and caulking.
- Week 6: Final inspection, cleanup, and client walkthrough.
This is a general guideline; unforeseen circumstances may necessitate adjustments. For larger or more complex projects, the timeline will naturally extend.
Essential Tools and Equipment for Siding Installation
Proper tools and equipment are essential for efficient and safe siding installation. The following list includes the most commonly used items:
- Measuring tapes and levels
- Circular saw, reciprocating saw, and hand saw
- Drill with various drill bits and screw gun
- Safety glasses, gloves, and hearing protection
- Scaffolding or ladders (appropriate for the job height)
- Nail guns (for certain siding types)
- Caulk guns and various caulking materials
- Utility knives and putty knives
- Hammer and various sizes of nails or screws
- Power washer for pre-installation cleaning
The specific tools may vary slightly depending on the type of siding being installed.
Safety Protocols and Best Practices for Siding Installation
Safety is paramount during siding installation. Adherence to strict safety protocols is crucial to prevent accidents and injuries.
- Personal Protective Equipment (PPE): Always wear safety glasses, gloves, hearing protection, and appropriate footwear.
- Ladder Safety: Use ladders that are properly rated for the weight and height, and ensure they are placed on stable ground.
- Scaffolding Safety: If scaffolding is used, ensure it is properly erected and secured.
- Fall Protection: Utilize fall arrest systems when working at heights exceeding six feet.
- Tool Safety: Maintain tools in good working condition and use them according to manufacturer instructions.
- Weather Conditions: Avoid working in inclement weather conditions, such as strong winds or rain.
- Site Awareness: Be aware of your surroundings and potential hazards on the worksite.
Regular safety meetings and training sessions are recommended to reinforce these practices.
Handling Unexpected Issues During Siding Installation
Unexpected issues can arise during any construction project. A proactive approach to problem-solving is key.
- Material Defects: If material defects are discovered, immediately contact the supplier and document the issue with photos and detailed notes. Replacement materials should be sourced promptly.
- Structural Issues: If underlying structural issues are found (e.g., rotted sheathing), these must be addressed before proceeding with siding installation. This may require the expertise of a structural engineer or carpenter.
- Weather Delays: Inclement weather can significantly impact the project timeline. Contingency plans should be in place to minimize delays. This might include rescheduling work or using protective coverings.
- Client Changes: If the client requests changes during the project, these should be documented, and any cost or schedule implications discussed and agreed upon before proceeding.
Open communication with the client is crucial throughout the process to ensure transparency and address any concerns promptly.
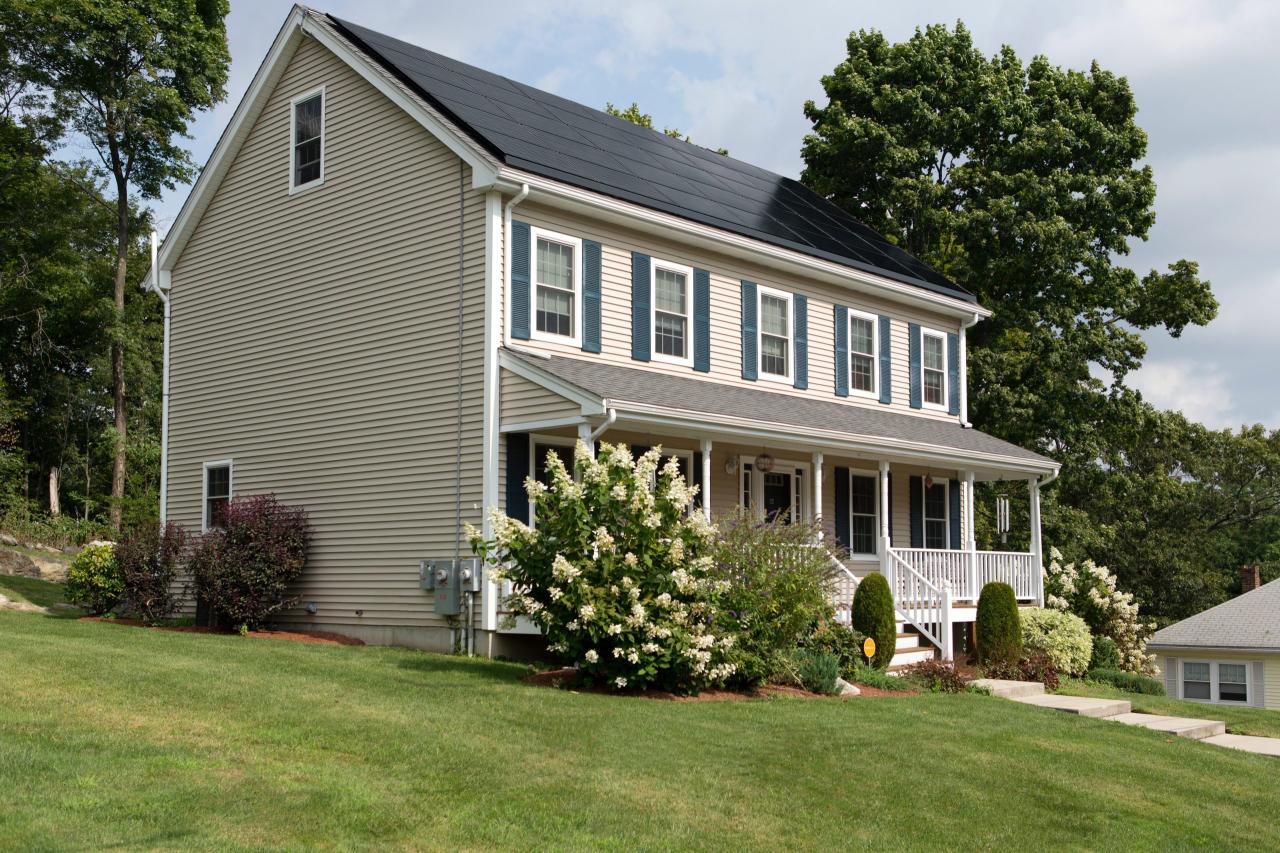
Visual Representation of Work

High-quality visual representations are crucial for showcasing the skill and expertise of siding contractors. Before-and-after photos, detailed project descriptions, and even 3D renderings can significantly impact a client’s decision-making process, building trust and confidence in the contractor’s abilities. This section explores how effective visual communication can elevate a siding business.A compelling before-and-after photo would depict a dilapidated home with faded, cracked, and possibly damaged siding.
The “before” image should clearly show the extent of the wear and tear, perhaps highlighting areas of water damage or significant discoloration. The “after” image, in stark contrast, would showcase the newly installed siding, displaying its vibrant color, smooth texture, and the overall improved aesthetic of the home. The transformation should be immediately apparent, emphasizing the improved curb appeal and the professional quality of the installation.
Clean lines, perfectly mitered corners, and even spacing between panels would all be visible, demonstrating attention to detail. The homeowner’s visible pride in the completed project, perhaps a happy family standing on the porch, could further enhance the image’s impact.
Complex Siding Installation Project Description
A recent project involved the complete siding replacement on a Victorian-era home with intricate architectural details. The house featured multiple gables, dormers, and bay windows, presenting significant challenges in terms of material cutting, precise measurements, and careful installation around existing window and door frames. The original siding was composed of overlapping clapboards, some of which were severely rotted and required careful removal without damaging the underlying structure.
The solution involved meticulous planning, utilizing specialized tools and techniques to accurately measure and cut the new vinyl siding to conform to the complex angles and curves of the home. The team employed advanced measuring techniques, including laser measuring devices, to ensure precise fit and minimize waste. Particular attention was paid to the intricate trim work around the dormers and bay windows, requiring custom-cut pieces and skillful installation to maintain the home’s historical character.
The final result was a seamless integration of modern siding with the home’s original architectural design, preserving its historical charm while significantly enhancing its durability and energy efficiency.
Utilizing 3D Renderings for Client Visualization
D renderings provide clients with a realistic preview of the final project before any work commences. These digital models allow clients to visualize different siding options, colors, and styles applied to their home’s unique architecture. For instance, a client considering a cedar shake siding could see a high-resolution rendering showcasing how the texture and color would look on their home, considering factors like lighting and shadow.
Similarly, a client unsure about a specific color can view multiple renderings with different color palettes applied to the same model, aiding in the selection process. This eliminates guesswork and allows for informed decision-making, minimizing the risk of dissatisfaction with the final result. Furthermore, 3D renderings can also help address potential concerns early on, such as how the siding will integrate with existing landscaping or architectural features.
By proactively addressing these aspects, the contractor can foster stronger client relationships and build confidence in their expertise.
Last Point
Selecting a siding contractor is a significant decision impacting both the aesthetics and longevity of your home. By carefully considering the factors discussed—market trends, contractor specializations, material properties, communication strategies, and project management—you can confidently choose a professional who delivers exceptional results. Remember to prioritize clear communication, thorough planning, and a commitment to quality craftsmanship for a successful project.
Quick FAQs
What is the average lifespan of different siding materials?
Lifespans vary greatly. Vinyl siding typically lasts 20-30 years, while fiber cement can last 50 years or more. Wood siding’s lifespan depends heavily on maintenance and can range from 20 to 50 years. Metal siding often boasts a lifespan exceeding 50 years.
How do I get multiple quotes from contractors?
Contact several contractors, providing them with detailed project specifications (size, materials, etc.). Request detailed, written quotes that clearly Artikel all costs, including materials, labor, and permits. Compare quotes carefully, considering not just price but also experience, reputation, and warranties.
What permits are typically required for siding installation?
Permit requirements vary by location. Check with your local building department to determine necessary permits before starting the project. The contractor should be responsible for obtaining the necessary permits.
What should I look for in a contractor’s insurance?
Ensure the contractor carries general liability insurance and workers’ compensation insurance. This protects you from potential liability in case of accidents or damage during the installation process.