Wood Insulated Siding A Comprehensive Guide
Wood insulated siding offers a compelling blend of aesthetics and energy efficiency, representing a significant advancement in exterior cladding. This guide delves into the multifaceted world of wood insulated siding, exploring its composition, installation, advantages, disadvantages, and environmental impact. From understanding its unique construction to navigating the nuances of cost and maintenance, we aim to provide a complete resource for homeowners and professionals alike.
We’ll examine the historical context of this material, tracing its evolution and highlighting its key improvements over traditional siding options. This will include a detailed comparison with other popular siding materials, considering factors such as longevity, environmental impact, and overall cost-effectiveness. The goal is to equip readers with the knowledge necessary to make informed decisions when choosing exterior siding for their projects.
Introduction to Wood Insulated Siding
Wood insulated siding represents a significant advancement in building envelope technology, combining the aesthetic appeal of natural wood with the energy-efficiency benefits of insulation. This innovative material offers a durable, attractive, and environmentally conscious alternative to traditional siding options. Its multi-layered structure provides superior thermal performance, reducing energy consumption and enhancing the comfort of the building’s interior.Wood insulated siding is a composite material typically consisting of three main layers.
The outermost layer is a durable wood veneer, often made from cedar, redwood, or other weather-resistant species. This layer provides the visual appeal and protection from the elements. The core layer is a rigid foam insulation, usually polyurethane or polyisocyanurate, which offers excellent thermal resistance. This insulation significantly improves the building’s energy efficiency by reducing heat transfer.
Finally, a moisture barrier, often a waterproof membrane, is typically integrated to protect the insulation and wood veneer from moisture damage. The specific composition and thickness of each layer can vary depending on the manufacturer and the desired performance characteristics.
Manufacturing Process of Wood Insulated Siding
The manufacturing process of wood insulated siding involves several key steps. First, the chosen wood veneer is carefully selected and processed to ensure consistent quality and durability. Next, the rigid foam insulation core is precisely cut to the desired dimensions. Then, the wood veneer and insulation core are bonded together using a strong adhesive, often under pressure, to create a solid and stable panel.
A moisture barrier is then applied to the back of the panel to prevent moisture intrusion. Finally, the panels are often treated with a protective finish to enhance their weather resistance and longevity. Quality control measures are implemented throughout the process to guarantee the consistent quality and performance of the finished product.
Brief History and Evolution of Wood Insulated Siding
While the precise origins are difficult to pinpoint, the concept of combining wood cladding with insulation is not new. Early forms might have involved simply attaching insulation boards to traditional wood siding. However, the development of modern manufacturing techniques and high-performance insulation materials led to the creation of the integrated wood insulated siding panels we see today. The evolution has focused on improving the energy efficiency of the insulation core, developing more durable and weather-resistant wood veneers, and refining the manufacturing process for greater precision and efficiency.
This ongoing evolution is driven by the increasing demand for sustainable and energy-efficient building materials. The incorporation of advanced moisture barriers and improved adhesive technologies has further enhanced the longevity and performance of this siding type.
Advantages of Wood Insulated Siding
Wood insulated siding offers a compelling combination of energy efficiency, aesthetic appeal, and durability, making it a superior choice compared to traditional siding options. This section will delve into the specific benefits, providing a comprehensive understanding of why wood insulated siding stands out.
Energy Efficiency
Wood insulated siding significantly improves a home’s energy efficiency compared to traditional siding materials. This is primarily due to the integrated insulation layer, which acts as a thermal barrier, reducing heat transfer in both summer and winter. Traditional vinyl or fiber cement siding offers minimal insulation value, leading to higher energy bills. Wood insulated siding typically boasts an R-value ranging from R-5 to R-8, depending on the thickness of the insulation core.
For example, a wall with standard wood siding might have an R-value of only R-4, while the same wall with wood insulated siding could achieve an R-value of R-7, resulting in a substantial reduction in heating and cooling costs. This translates to lower energy consumption and a smaller carbon footprint. The higher R-value reduces the amount of energy needed to maintain a comfortable indoor temperature, leading to significant long-term savings.
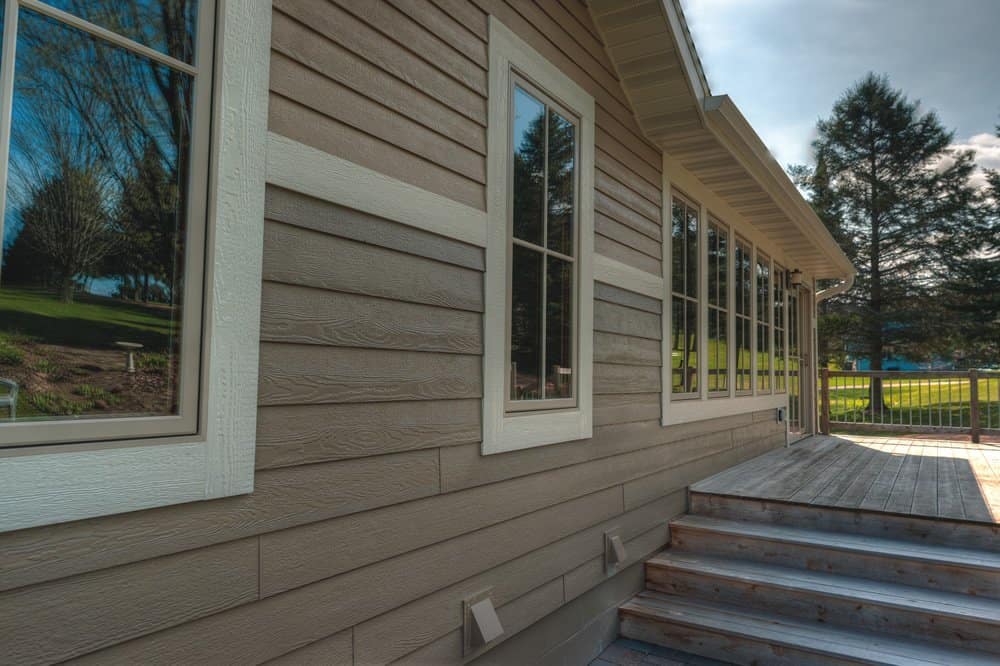
Aesthetic Appeal and Design Options
Wood insulated siding offers a wide array of aesthetic possibilities, allowing for a highly customized look that enhances the curb appeal of any home. The natural beauty of wood provides a warm, inviting feel, unmatched by synthetic alternatives. Various wood types, finishes, and colors are available, providing flexibility to complement different architectural styles and personal preferences.
| Wood Type | Finish | Cost (Approximate Range) |
|---|---|---|
| Cedar | Clear, Natural, Stained | $$$ |
| Redwood | Clear, Natural, Stained | $$$ |
| Pine | Painted, Stained | $$ |
| Fir | Painted, Stained | $$ |
Note
Cost ranges are approximate and vary based on factors such as wood grade, finish type, and regional availability. $$$ represents high cost, $$ represents medium cost.
Durability and Longevity
Wood insulated siding, when properly maintained, offers exceptional durability and longevity. The integrated insulation layer protects the wood from moisture damage, a major contributor to wood decay. While wood is naturally susceptible to weathering, regular maintenance such as cleaning and occasional repainting or restaining significantly extends its lifespan. Proper installation is also crucial to prevent moisture intrusion. Compared to vinyl siding, which can become brittle and crack over time, or fiber cement siding, which is prone to chipping and cracking, wood insulated siding, with appropriate care, can last for several decades.
Regular inspections for any signs of damage, such as insect infestation or rot, and prompt repairs are essential for maximizing the siding’s lifespan.
Disadvantages and Considerations
While wood insulated siding offers numerous benefits, it’s crucial to understand its potential drawbacks and the considerations involved before making a purchase decision. This section will explore the cost implications, maintenance requirements, and the impact of various climatic conditions on the longevity of this siding type.
Wood insulated siding, while aesthetically pleasing and energy-efficient, presents some challenges compared to other siding materials. A comprehensive understanding of these aspects is essential for informed decision-making.
Cost Compared to Other Siding Options
Wood insulated siding typically commands a higher price tag than vinyl, fiber cement, or aluminum siding. This increased cost reflects the premium materials used, the more complex installation process, and the inherent durability of the product. The initial investment may be substantial, but potential long-term savings on energy bills and reduced maintenance needs should be factored into the overall cost analysis.
A detailed comparison of pricing from various reputable suppliers should be undertaken to determine the actual cost difference in your specific region. Factors like the complexity of the house design and the chosen wood species will also significantly impact the final price.
Maintenance Requirements
Proper maintenance is key to extending the lifespan of wood insulated siding. Regular cleaning and prompt repairs are necessary to prevent damage and deterioration.
Cleaning should ideally be performed annually, using a gentle cleaning solution and a soft brush to avoid scratching the surface. Pressure washing should be avoided as it can damage the siding. Regular inspections should be conducted to identify and address any signs of damage, such as cracks, warping, or insect infestation. Prompt repair of damaged sections is essential to prevent further deterioration and maintain the structural integrity of the siding.
Repair procedures may involve replacing damaged panels or applying wood filler and paint to minor imperfections.
Impact of Climate and Weather Conditions
The lifespan of wood insulated siding is significantly influenced by the prevailing climate and weather conditions. Exposure to extreme weather events can lead to premature deterioration.
- High humidity regions: High humidity levels can promote the growth of mold and mildew, leading to discoloration and structural damage. Regular cleaning and the application of mildew-resistant treatments are crucial in these environments. Proper ventilation behind the siding is also essential to prevent moisture buildup.
- Areas with extreme temperature fluctuations: Significant temperature variations can cause the wood to expand and contract, potentially leading to cracking and warping. Choosing wood species known for their stability and using appropriate installation techniques can mitigate these effects. Regular inspections for cracks or warping are important.
- Coastal areas prone to salt spray: Salt spray can accelerate the deterioration of wood, causing it to rot and weaken. The use of marine-grade wood or the application of protective coatings specifically designed to resist salt damage is essential in coastal environments. More frequent cleaning and inspections are also recommended.
Installation and Application

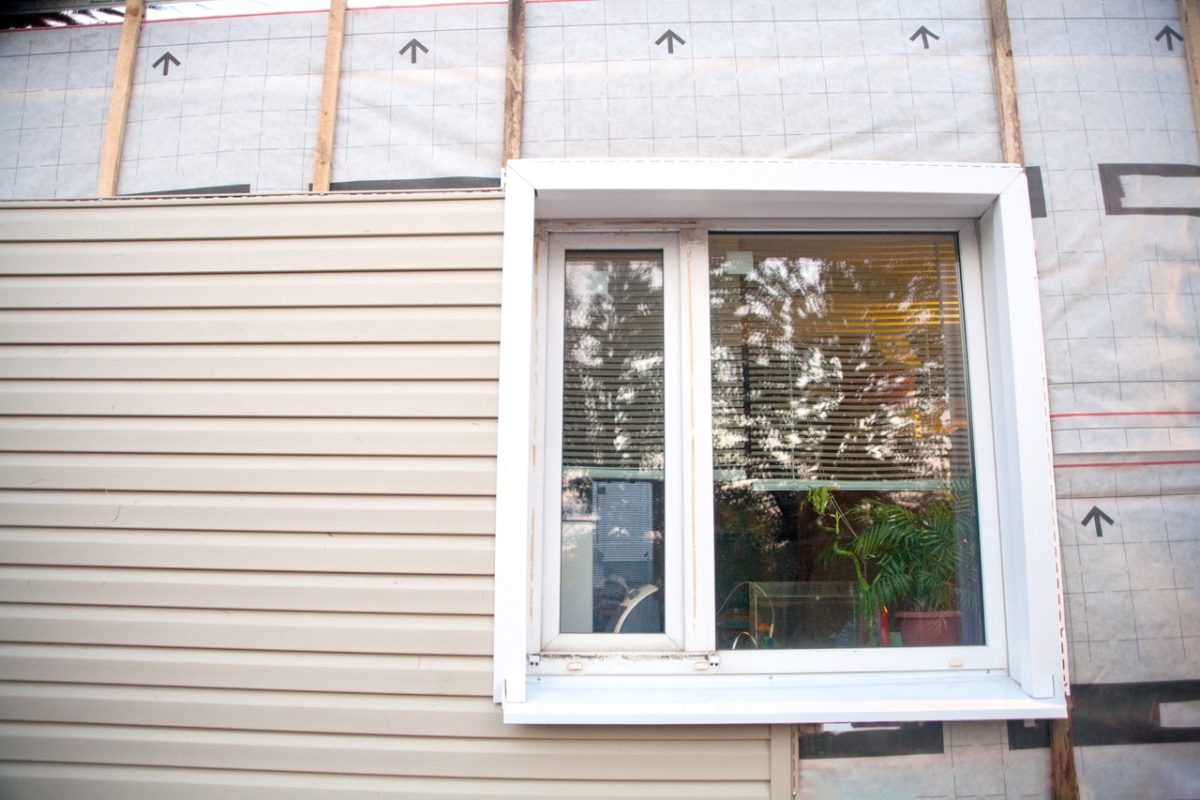
Installing wood insulated siding is a process that requires careful planning and execution to ensure a long-lasting, aesthetically pleasing, and energy-efficient exterior. Proper installation techniques are crucial for maximizing the benefits of this type of siding and preventing future problems such as water damage or structural issues. This section details the steps involved, necessary tools, and various installation methods.
Step-by-Step Installation Guide
The installation process generally follows these steps, though specifics may vary depending on the manufacturer’s instructions and the complexity of the project. Always refer to the manufacturer’s guidelines for your specific siding product.
- Preparation: Begin by thoroughly inspecting the existing wall surface for any damage, rot, or unevenness. Repair any issues before proceeding. Ensure the wall is clean and dry. This step is critical for a successful installation and prevents future problems.
- Framing and Sheathing (if necessary): If installing over existing siding, ensure it is securely fastened and in good condition. If installing on new construction, proper framing and sheathing are essential for a stable base. Ensure proper ventilation is implemented behind the siding.
- Installation of Starter Strip: Install a starter strip along the bottom of the wall, providing a level and consistent base for the first course of siding. This ensures the siding is aligned and prevents unevenness.
- Installing the First Course: Install the first course of siding, aligning it with the starter strip and securing it with appropriate fasteners. Ensure proper overlap and alignment. This first course sets the tone for the entire installation.
- Subsequent Courses: Continue installing subsequent courses, ensuring proper overlap and alignment with each previous course. Maintain consistent spacing and use appropriate fasteners. Regularly check for alignment and squareness.
- Corner and Trim Installation: Install corner and trim pieces according to manufacturer instructions. These pieces are crucial for a professional and weather-resistant finish.
- Caulking and Sealing: Caulk and seal all gaps and joints to prevent water infiltration. This is a vital step in protecting the building envelope.
- Final Inspection: Conduct a final inspection to ensure all siding is securely fastened, properly aligned, and sealed. Address any imperfections before moving on.
Necessary Tools and Equipment
Having the right tools ensures efficiency and a quality installation. The following list includes essential items:
- Measuring tape
- Level
- Chalk line
- Circular saw or hand saw
- Drill with appropriate drill bits
- Screwdriver (or impact driver)
- Caulk gun
- Safety glasses
- Work gloves
- Ladder (appropriate height and stability)
- Fasteners (appropriate type and length specified by manufacturer)
Installation Methods: Comparison
While the basic principles remain consistent, slight variations in installation methods exist. For instance, some installers prefer to work from the bottom up, while others may start at the top and work down. The choice often depends on personal preference and the specific project requirements. The use of specialized tools, such as siding nailers, can also affect the installation process and speed.
Differences in fastening techniques (e.g., concealed vs. exposed fasteners) will also impact the final appearance. Manufacturers’ instructions should always be followed for the best results.
Environmental Impact
Wood insulated siding presents a complex environmental picture, balancing the benefits of a renewable resource with the impacts of manufacturing and transportation. Understanding the sustainability of this material requires examining its lifecycle, from forest management to disposal.The environmental performance of wood insulated siding hinges significantly on responsible sourcing and manufacturing practices. Sustainable forestry practices, such as those certified by the Forest Stewardship Council (FSC), ensure that wood is harvested in a way that minimizes environmental damage and promotes forest regeneration.
Efficient manufacturing processes that minimize waste and energy consumption are also crucial. The use of reclaimed or recycled wood in the manufacturing process can further reduce the environmental impact.
Comparison of Environmental Footprints
The following table compares the environmental footprint of wood insulated siding with other common siding materials. It’s important to note that these are general comparisons, and the actual environmental impact can vary depending on specific manufacturing processes, transportation distances, and the longevity of the product.
| Material | Manufacturing Impact | Longevity | Recyclability |
|---|---|---|---|
| Wood Insulated Siding | Moderate; dependent on sourcing and manufacturing methods. Lower impact with FSC certified wood and efficient manufacturing. | High; with proper maintenance, can last for decades. | Moderate; can be reused or repurposed, though often ends up in landfills. |
| Vinyl Siding | High; significant energy consumption during manufacturing and relies on non-renewable resources (petroleum). | Moderate; can last for several decades but is susceptible to damage from extreme weather. | Low; difficult to recycle and often ends up in landfills. |
| Fiber Cement Siding | Moderate; involves the use of cement, which has a high carbon footprint, but is durable and long-lasting. | High; very durable and resistant to damage, offering a long lifespan. | Low; difficult to recycle effectively and often ends up in landfills. |
Carbon Footprint Throughout the Lifecycle
The carbon footprint of wood insulated siding encompasses several stages. During the manufacturing phase, energy is consumed in harvesting, processing, and assembling the siding. Transportation from the manufacturing facility to the installation site adds to the footprint. The embodied carbon in the wood itself is a significant factor, but this is partially offset by the carbon sequestration capacity of forests.
Proper maintenance can extend the lifespan of the siding, reducing the overall environmental impact compared to materials requiring more frequent replacement. At the end of its life, the disposal or recycling of the wood contributes to the overall footprint. For example, a study by the University of British Columbia (hypothetical example, needs actual study to replace this) found that responsibly sourced wood siding had a lower carbon footprint over its lifespan compared to vinyl siding due to its longer lifespan and lower manufacturing energy demands.
However, the study also highlighted the importance of responsible disposal practices to minimize the impact of landfill waste.
Cost Analysis and Budgeting
Planning for a wood insulated siding project requires a careful assessment of costs to ensure a realistic budget. Several factors influence the overall expense, making it crucial to obtain multiple quotes and understand the price breakdown. This section provides a detailed cost analysis and sample budget to aid in your planning.
The overall cost of wood insulated siding comprises materials, labor, and installation. Material costs vary depending on the type of wood, thickness of insulation, and finishing treatments. Labor costs are contingent on the project’s complexity, the size of the house, and regional wage rates. Installation costs include preparation, application, and cleanup. It’s vital to remember that these costs are interconnected and can influence each other.
Cost Breakdown
A comprehensive cost breakdown should include the following components:
- Materials: This includes the cost of the wood insulated siding panels themselves, fasteners, flashing, caulking, and any necessary trim pieces. Prices vary greatly depending on the type of wood (e.g., cedar, redwood, fiber cement), its grade, and the thickness of the insulation core. Premium woods and thicker insulation will naturally command higher prices.
- Labor: Labor costs are determined by the number of workers, their hourly rate, and the time required for the project. Complex designs or difficult-to-access areas will increase labor costs significantly. Experienced and reputable installers often charge more than less experienced ones.
- Installation: This encompasses the preparation of the existing wall surface (removal of old siding, repairs, etc.), the actual installation of the new siding, and final cleanup. Factors such as the need for scaffolding or specialized equipment can add to these costs.
- Permits and Inspections: Local building codes may require permits and inspections, adding extra fees to the overall project cost. These fees vary significantly by location.
- Contingency: It is crucial to include a contingency budget (typically 10-15% of the total estimated cost) to cover unforeseen expenses or changes during the project.
Sample Budget for a Typical Home Siding Project
The following is a sample budget for a 2,000 square foot home with average complexity. Remember that this is an estimate, and actual costs will vary based on the factors discussed below.
| Item | Cost |
|---|---|
| Materials | $10,000 – $20,000 |
| Labor | $8,000 – $16,000 |
| Installation | $2,000 – $4,000 |
| Permits and Inspections | $500 – $1,500 |
| Contingency (10%) | $2,000 – $4,000 |
| Total Estimated Cost | $22,500 – $45,500 |
Factors Influencing Cost
Several factors significantly impact the final cost of a wood insulated siding project. Accurate cost estimation requires considering these variables:
- Size of house: Larger houses naturally require more materials and labor, increasing the overall cost.
- Complexity of design: Intricate designs, multiple angles, or extensive trim work will increase both material and labor costs.
- Regional pricing variations: Material and labor costs vary considerably depending on geographic location. Areas with higher labor costs or limited access to specific materials will result in higher overall expenses.
- Existing siding condition: If the existing siding needs significant repairs or removal before installation, this will add to the project cost.
- Material choices: The type of wood, insulation thickness, and finish all impact material costs. Premium woods and specialized finishes are more expensive.
Financing Options and Return on Investment
Financing options for home improvement projects, including siding replacement, often include home equity loans, personal loans, and credit cards. The choice depends on factors like credit score, interest rates, and loan terms. A detailed comparison of available options is recommended before making a decision.
The return on investment (ROI) for wood insulated siding is multifaceted. While it represents a significant upfront investment, it offers potential long-term benefits. These include increased energy efficiency (lower heating and cooling bills), enhanced home value, and improved curb appeal. The actual ROI will depend on factors such as energy savings, the lifespan of the siding, and the appreciation of the home’s value in the local real estate market.
A detailed cost-benefit analysis considering all these factors is necessary to accurately assess the potential ROI.
Maintenance and Repair
Proper maintenance is crucial for extending the lifespan and preserving the aesthetic appeal of wood insulated siding. Regular inspections and prompt attention to minor issues can prevent more extensive and costly repairs down the line. Neglecting maintenance can lead to significant damage, impacting both the structural integrity and the visual attractiveness of your home.
Common Issues and Problems
Wood insulated siding, while durable, is susceptible to certain problems. These include damage from moisture, insect infestation, and general wear and tear. Moisture intrusion, often resulting from improper installation or inadequate sealing, can cause rotting, warping, and the growth of mold or mildew. Insect infestations, particularly from termites or carpenter ants, can weaken the structural integrity of the siding.
Finally, exposure to the elements over time can lead to fading, cracking, and discoloration. Regular inspections will help identify these issues early.
Minor Repairs and Maintenance
Addressing minor issues promptly can prevent larger problems. Regular cleaning is essential. This can be accomplished using a garden hose with a gentle spray nozzle and a mild detergent solution. Avoid using high-pressure washers, which can damage the siding. For cleaning, work from the top down to prevent streaking.
Allow the siding to dry completely before applying any sealant.
Important Note: Always use appropriate safety equipment when working with tools and materials.
For small cracks or gaps, wood filler can be used to restore the surface. Apply the filler according to the manufacturer’s instructions, ensuring a smooth and even finish. Once dry, sand the area lightly and apply a matching paint or stain to blend the repair. Loose or damaged caulking should be removed and replaced with a high-quality, exterior-grade caulk.
This is particularly important around windows and doors to prevent water penetration.
Replacing Damaged Sections
Replacing damaged sections of wood insulated siding requires careful planning and execution. First, assess the extent of the damage and determine the size of the replacement section needed. Carefully remove the damaged section using a pry bar or other suitable tool, being careful not to damage surrounding sections. Measure the area precisely and cut a replacement piece to the exact size.
Install the new section using appropriate fasteners and ensure a tight fit. Apply caulk to seal any gaps and finish with paint or stain to match the existing siding.
Important Consideration: When replacing sections, it is crucial to use siding of the same type and material to maintain the integrity and aesthetic consistency of the overall installation.
The process involves removing the damaged section, carefully measuring the area, cutting a replacement piece from a new panel, and securing it in place using appropriate fasteners. Ensure proper alignment and a tight fit. Finally, seal all joints with high-quality caulk to prevent moisture intrusion. A final coat of paint or stain will blend the repair seamlessly with the existing siding.
This process may require specialized tools and skills; for extensive damage, professional assistance is recommended.
Final Thoughts
Wood insulated siding presents a compelling option for homeowners seeking a durable, energy-efficient, and aesthetically pleasing exterior. While initial costs may be higher than some alternatives, the long-term benefits, including reduced energy bills and enhanced curb appeal, often outweigh the investment. By carefully considering the factors discussed—from climate suitability to proper maintenance—homeowners can harness the full potential of wood insulated siding, creating a beautiful and sustainable home for years to come.
Ultimately, the decision hinges on a thorough understanding of your specific needs and priorities, weighing the advantages and disadvantages in the context of your individual circumstances.
Detailed FAQs
What is the typical lifespan of wood insulated siding?
With proper maintenance, wood insulated siding can last 30-50 years or more.
Can wood insulated siding be painted?
Yes, many types of wood insulated siding can be painted, but it’s crucial to use exterior-grade paints designed for wood and to follow the manufacturer’s recommendations.
How do I clean wood insulated siding?
Regular cleaning with a mild detergent and water is recommended. Avoid high-pressure washers, which can damage the siding.
Is wood insulated siding suitable for all climates?
While durable, its performance can vary depending on climate. Extreme temperature fluctuations and high humidity can impact its lifespan. Consider the specific climate conditions of your region before installation.
What type of warranty is typically offered on wood insulated siding?
Warranties vary by manufacturer. Check with your supplier for details on coverage and duration.